Spaces feature is added into MAC OS X 10.5 in order to store applications in particular parts of your Window screen. MAC OS X allows you to shift any application from one space to another. You can also set specific spaces manually from MAC OS X system preferences. To open application, go to spaces window and click on the specific section that you want.
How to use spaces
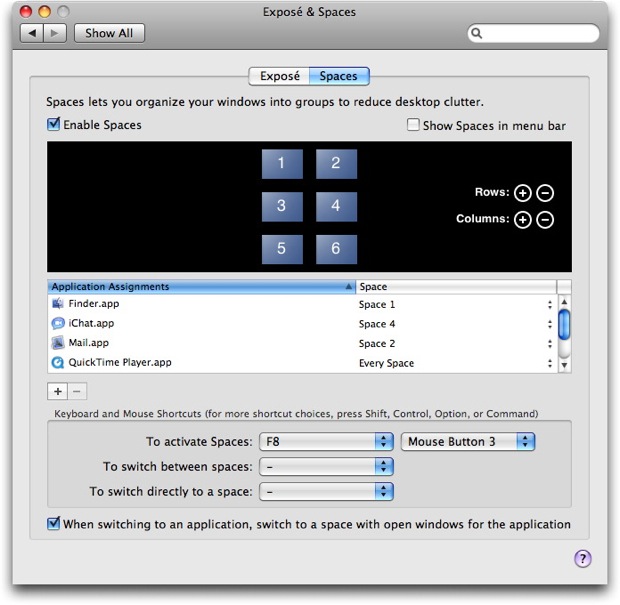
- Go to expose and spaces window and check the box “Enable Spaces”.
- Check the box “Show spaces in menu bar” to use menu bar for moving from one space to another. Simply click on desired square box with a number on it and it will shift space according to number that you have selected. If you want to activate spaces by mouse, click on “To Activate Spaces” option and then select mouse button from drop down menu.
- To choose number of spaces, click on plus symbol that is located in front of “Rows and Columns”. From here you can select the grid that you want to use for spaces.
- To delete rows or columns, click on minus symbol next to “Rows or Columns”. It is recommended to turn off spaces before you delete a row or column. Similarly you can make various changes of your need.
- Give particular space to any application by clicking on plus sign located above shortcut buttons.
- Finder pane will appear. Now you can select and assign any application that you want.