 The following are Apple’s instructions for installing RAM (memory) in your MacBook Pro.
Your MacBook Pro computer has two memory slots that you access by removing the memory door in the battery bay. Your MacBook Pro comes with at least 512 megabytes (MB) of 667 MHz Double Data Rate (DDR2) Synchronous Dynamic Random-Access Memory (SDRAM) installed. It may have more memory preinstalled, depending on the configuration you chose when you bought the computer.
Both memory slots can accept an SDRAM module that meets the following specifications:
– Double Data Rate Small Outline Dual Inline Memory Module (DDR SO-DIMM)format
– 1.25 inch or smaller
– 512 MB or 1 gigabyte (GB)
– 200-pin
– PC2-5300 DDR2 667 MHz Type RAM
Depending on the configuration of the MacBook Pro you purchased, both memory slots may already be full. The maximum amount of memory you can install in your MacBook Pro is 3 GB (see article 304662; using 1 GB DIMM and 2 GB DIMM in each slot).
Installing Additional Memory
Before installing additional memory, you will need to remove your battery and put it back in after installing the memory. The following procedure includes all the necessary instructions for both parts of the process.
Removing the Battery
1. Shut down your MacBook Pro. Disconnect the power adapter, Ethernet cable, and any other cords connected to the MacBook Pro, in order to prevent damaging the computer.
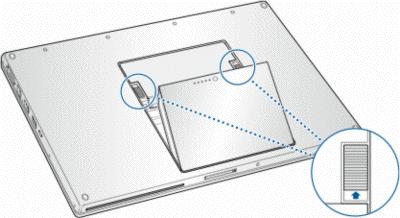
2. Turn the computer over.
3. Locate the battery release latches on each side of the battery.
4. Slide both latches up. The battery should pop up slightly.
5. Lift the battery out.
Installing the New Memory
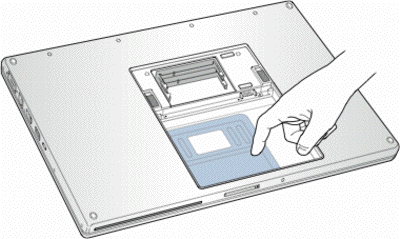
1. Using a Phillips size 00 screwdriver, unscrew the memory door and remove it from the battery bay of your computer.

2. Touch a metal surface inside the computer to discharge any static electricity from your body.
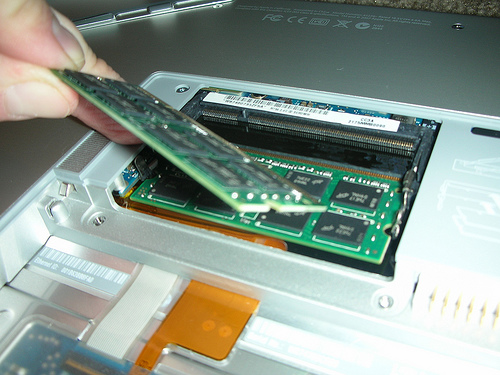
3. If you need to remove a memory card (for example if you are replacing it or if you need to get past the memory in the top slot to access the bottom slot), you can remove the card by spreading the tabs on each side of the card away from the notches in the memory card. The card should pop up slightly. Lift the memory card to about a 25-degree angle and then gently slide the card out of the memory slot.
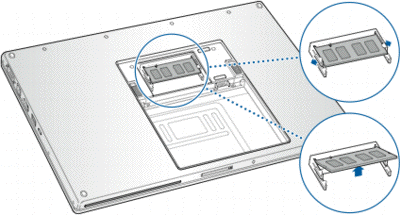
4. Insert the new memory card at a 25-degree angle. Line up the notch in the card with the small tab in the memory slot and slide the card into the slot until the gold edge is almost invisible. Then firmly push the memory card into the memory slot. You might feel some resistance.
5. Gently spread the small tabs in the memory slot away from the notches and push the memory card down until the two tabs on either side of the card lock into place.
Note: Make sure your memory is installed according to the illustration above, where the gold contacts are almost completely inserted into the connector.
6. Insert any additional memory in the second slot.
7. Replace the memory door and make sure the door is lying flat before you screw it back into place.
Insert the Battery
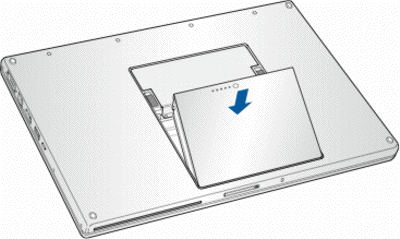
1. Place the bottom edge of the battery into the battery compartment at an angle, as shown below.
2. Gently press the top edge of the battery down until the battery latch locks into place.
Here is a video Tutorial
[youtube]http://www.youtube.com/watch?v=kBYDKgwiOS4[/youtube]