 |
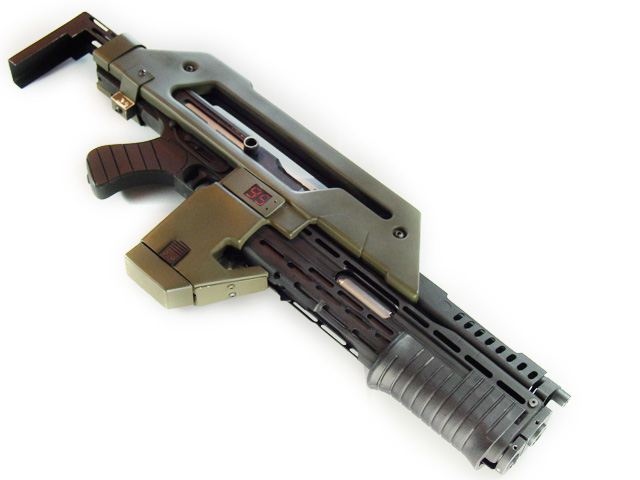
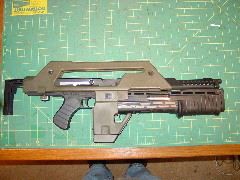
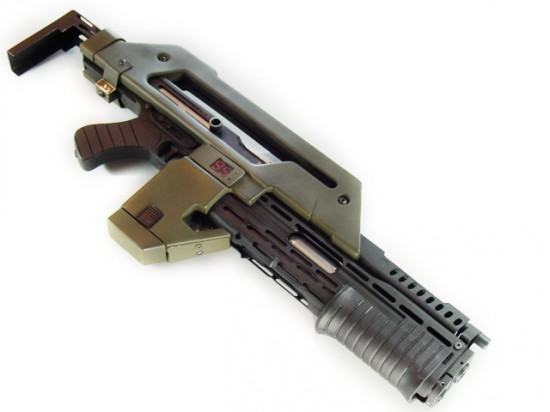
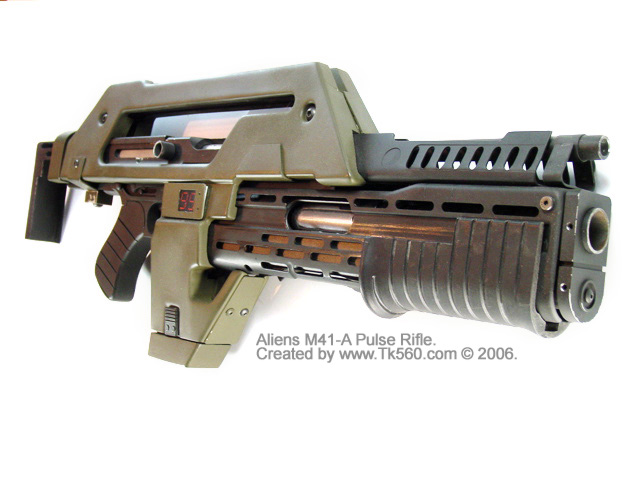
| M41-A Finished at last! |
Some sci-fi props are cool, some are neat, and some are just plain corny. To qualify for cool, the prop has to strike a special nerve for me. The M41-A Pulse Rifle is such a prop. As seen in the 1986 movie “Aliens”, this prop became an instant classic. With is fully functional hero models that fired 45 cal. blanks, and blank 12 guage shot gun rounds, to the ultra-slick O.D. green shrounds, this prop is the rare weapon that seemed it could actually do what it appeared to do in the movie! Shoot! This ain’t no raygun, baby!
Made from three real world weapons, the M41-A even has a cool sounding name. The World War II vintage M1A1 Thompson makes up the bulk of the weapon, and the Remington 870 shotgun is the guts for the “grenade launcher”. Carefully hidden inside a SPAS-12 heat shield cage and pump handle. The filming hero prop was made with a metal shroud, and is truly a work of art.
What follows on this page is my online diary of the construction of my M41-A. Although it is made like the filming props, all the firearms had been deactivated, and can never fire a live round again. As per BATF requirements.
Introduction:
After 18 months, a lot of help from Kip H. and Phil S., a bankrupt credit card, and a lot of flack from the wife, I am finally ready to start the building process. After careful examination of this project, I’ve decided to break this down into its basic components, build them up and and then attempt a final assembly. The construction of M41-A will be within the guidlines of the law. Period.
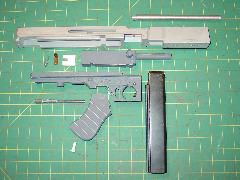
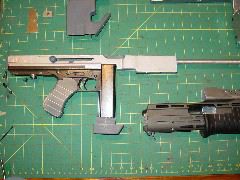
The parts are difficult to find. Remaining true to the original prop construction, and remaining within the guidlines of the US law, I decided to go with as many real gun parts as possible. No one offers a turn key M1A1, even the kits lack many of the needed parts. Most don’t offer the SPAS 12 or M1A1 parts. This project really was a find as you go project. I started with resin replicas and upgraded them when I got the real parts. Note: The pic of the M1A1 is the resin replica. i never took a picture of the real thing.
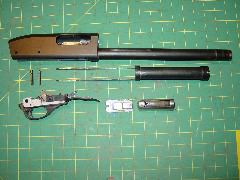
| The Grenade Launcher: Rem870/SPAS12 | |
 |
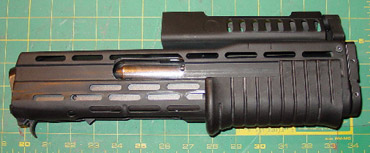 |
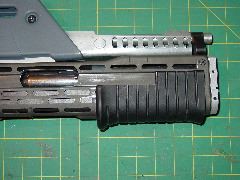
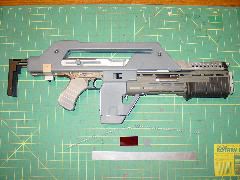
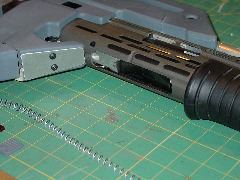
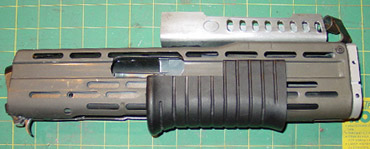
| Assembly complete before painting. | final assembly, after painting flat black. Ready to install. |
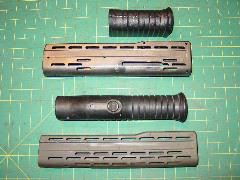
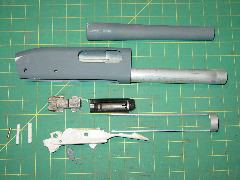
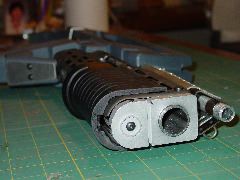
The SPAS/Rem870 “Grenade launcher” is by far the most challenging part of the whole build. My first attempt was to use some cheap airsoft SPAS12. As it turns out, these are not very accurate, complete, or to scale. A version can be made to work, but the airsoft cage will require a lot of modifying. Locating a real SPAS12 pump handle and cage is hard work. No online sources still have any, your best bet is to post some requests on the RPF, ASAP, or the BBC and other forums, and go to local gun shows looking for parts. I was lucky found a real SPAS cage/pump handle set.The grenade launcher requires a cut down Remington 870 shotgun and a lot of custom fitting/cutting.In addition, there are several greeblies to add to make this work. To complete the grenade launcher requires destroying a functioning Rem 870, and chopping parts of the SPAS. For me, it is the hardest part to get going. I really hate messing up perfectly good parts!
I had the option to cut down a real Rem 870 or use a resin replica from Kip. Remaining true to the original mission of this prop, [to build it like the originals prop makers did,] I decided to go with the real one. The only change will be to use a dummy wooden dowel barrel, deactivate the bolt, weld a spacer block in front of the receiver, forever making the receiver of the 870 from ever beign able to add a real barrel, or chamber a round. Thats the law. This way, I still get the real parts and keep it legal. One of the best sources for real Remington 870’s are local pawn shops. These are very common, and can be had for as little as $150. Ask for an “Express” these have plain stocks, and a matt finish. I also got a resin replica from Kip, and I will use it along with the extra parts I have to build a stunt version M41-A.
Next is the M1A1 modifications. A lot of M41-a builders use Tokyo Mauri airsoft M1A1’s, as a foundation. I decided I wanted to stay as true to the originals as I could, which means real or replica M1A1 parts. As it turns out, the upper receiver, the part of the weapon the BATF calls a gun, is available regularly, on the internet. Sold in 80% complete form, these are not considered to be functioning receivers. Much machine work is to be done and you really don’t need and modifications unless you want a working bolt. [for this the receiver requires a metal block to be welded to the front] See the link section for parts suppliers. The “grip frame assembly” the part with the trigger and all the switches, is VERY difficult to locate. SARCo. has them for $225 and includes the wooden pistol grip. These are very greasy, rusty and beat up. They will require a lot of cleaning, and painting. My suggestion is to get one before they are all gone. Long since past are the availability of WWII issue M1A1 Thompson parts kits. No vendors have them, and when one comes up on Ebay, expect to pay $600 + for it. Unless you want to build a complete M1A1 replica, you don’t really need any other parts from a parts kit, except the stock mount bolt and the bolt handle. [complete bolt if you want a working one.]
Kip also sells a resin/metal M1A1 parts set that includes only the parts you need for a M41-A. These are very nice, and detailed, and include real M1A1 parts. You could even build a Replica M1A1 with his kit if you could got a stock set, and a barrel.
I got lucky and found a 80% replica metal upper and real grip frame. I will use the resin version for the stunt M1A1.
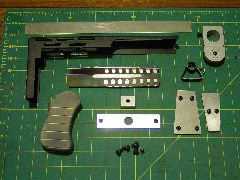
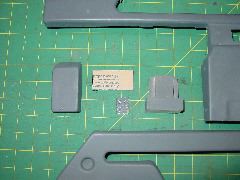
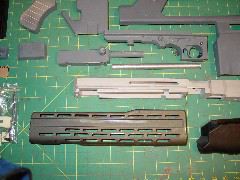
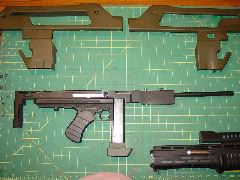
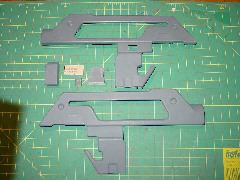
Finally the custom shells that define the shape of the M1A1. There are at least 3 online vendors selling plastic, resin, and resin/fiberglass versions. I went with the resin/fiberglass ones. Mainly for price. The smaller parts, can be made from items bought at the local hardware store. No one is making metal shrouds. The stock can be made or Dean O. sells them. He also sells the barrel vent and triangle. The famous counter can be had from Phil S. He also sells the grenade launcher front block as well as a host of other M41-A parts. Aside from the shroud, most of the remaining parts can be fabricated from metal, styrene even wood stock. I have seen pictures of “hardware” store made shroud sets. I am too lazy to make a shroud set when I can get one for $70.
| Final Assembly & Paint | |
 |
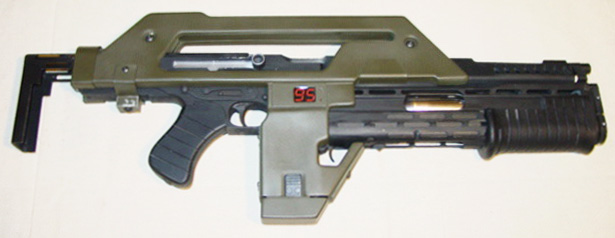 |
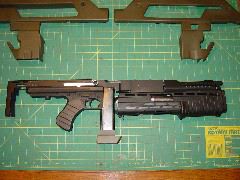
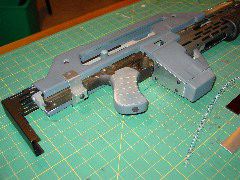
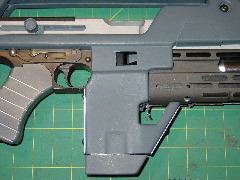
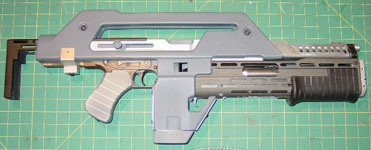
| Final Fitting before color. | Fitting after color. Weathering and small parts, a lighted counter a back strap, and sling are still to be added. Also, the pump handle needs a re-work. |
Tips on Getting Started
The Pump Handle:
Once the parts have been bought, its time to get building. First the SPAS Pump handle. Its on the second “Short” line. You will also have to cut the ejector port slot for the handle as well. Fit it to the SPAS cage and play with its action. Get to hacking, don’t be timid! Cut that thing down! Also, you will need to heat it up so that you can work its action on the finished SPAS cage. Microwave a big bowl of water or boil some H2O on the stove. Take the water off the heat, and, dip the pump handle in the hot water. Let it set a few seconds, then pull it out some. Spreading it apart. By the time the rem 870 gets installed, the cage swells a little making the pump handle difficult to operate.
The SPAS-12 Cage:
If you can find it! Man this part is hard to get. Practice cutting the ejection port on a Airsoft version first. Measure about a dozen times before you star cutting up the real thing. Look closely at pictures of the real one, and take particular note on how how it lines up with the ejection port with the Rem 870 and the slots on the cage. Make the straight cuts first. use a Dremel with a cut-off disc. Besides the ejection port, the area where you load the shells will have to be cut, and the front end, and a couple of the left hand side struts will have to be clipped to make way fro the Rem870 action. There are a lot of places you can screw up the cage. Take it easy.
The Stock:
This part can be made by hand or purchased online. You can decide if you want it a “functional” retracting stock, or permanently fixed. I went with a fixed stock, mainly because you never saw the stock in the out position, and it looks kind of dorky all the way out.Just bolt that sucker to the M1A1 upper. You will have to drill and tap holes in the upper to bolt it on.
The Shrouds:
Take your time fitting these together. Paint them any Army OD color you want, but don’t go too “Green”. Test some deer stand paints at your local pawn shops. I found that this paint is better than any other to give your PR that “screen seen” look. Also know as “duck boat paint” To me, the bestrewn looks way off in person. It may be accurate to the original prop, but when your friends look at that brown shroud, they will say, “Man, what happened to the color? That’s suppose to be green!” IMHO.
Mounting the M1A1 to the Launcher:
If your Upper has that BATF required front block, then you can drill holes straight through. All you will have to do then is mark where the bolts hit the Rem870 receiver, and drill and tap the Rem870. Take your time, because if you are off, your launcher will be crooked. You will need at least 2 holes drilled to provide a decent firmness to the whole assembly.
The Paint:
Lot’s of M41-A Pulse rifles are made using the original Humbrol “Bessbrown” paints. Other use an idealized OD green color, or some combination. It is my opinion, to try and paint the PR with a color that approximates the screen appearance. This color is a brownish green. Some builders use a Testor Model Master “umber” as a base color. The Humbrol Bessbrown is no longer available, and is a difficult color to work with. I’ve tested many “off the shelf” army green colors, and the best I have found is Boss Game Systems Camouflage Olive Drab Spray Paint #70-DM-2, Bryan, TX 77803 http://www.bossgamesystems.com. You will have to call and ask for the #70-DM-2 color. It is green, but has more of a military Olive color with a tint of brown that most OD green lacks. In my opinion its a great compromise between what you saw in the movie, and what the real prop was painted. After your friends laugh at that bessbrown, you will want to re-paint it something that looks more like what you saw on screen.
Good luck!
Below is a guesstimate on the cost of the hero vs. the stunt. Granted The Stunt version has more hand fabricated parts, the cost is about 1/4 of the Hero.
|
Estimated costs:
|
Real Parts Price [HERO]
|
Resin Replica/Airsoft Price [STUNT]
|
|
M1A1 Thompson Lower
|
$225
|
$45
|
|
M1A1 Thompson Upper 80%
|
$125
|
$25
|
|
M1A1 Misc. Parts
|
$45
|
$15
|
|
Remington 890 Shotgun
|
$150
|
$65
|
|
SPAS-12 Pump handle
|
$40
|
$10
|
|
SPAS-12 Cage
|
$100
|
– part of the Airsoft SPAS
|
|
Shroud Kit (Resin/fiberglass)
|
$70
|
$70
|
| Stock |
$65
|
– scratch built from store stock
|
|
Barrel Vent
|
$70
|
– scratch built from store stock
|
|
Barrel triangle
|
$25
|
– scratch built from store stock
|
|
misc. Small parts
|
$50
|
– scratch built from store stock
|
|
Counter
|
$35
|
– scratch built from store stock
|
|
Total
|
$1000
|
$230
|
