PwnageTool bundle has been released for jailbreaking the iPad on iOS 4.3 firmware. However, using it results in a tethered jailbreak. This means that to boot it in to jailbroken state, you have to use tetheredboot utility on each reboot.
1. To modify the PwnageTool, follow the given steps
- Extract the zip folder of downloaded PwnageTool bundle. Locate the following file and place it on the desktop.
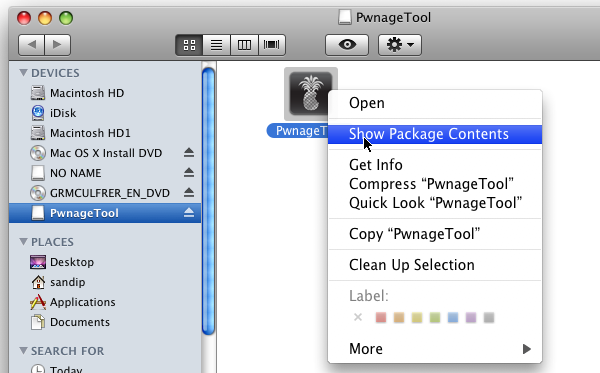
- Place the PwnageTool version 4.2 in /Applications directory. Now right-click it and select “Show Package Contents”
- Browse to Contents/Resources/FirmwareBundles/ and paste the file
2. Now to create custom firmware, do as explained below.
- Download and place the file of iPad iOS 4.3 GM at the desktop.
- Launch the PwnageTool using its “Expert Mode” and choose the device.
- Find the iPad iOS 4.3GM firmware.
- Click the button of Build to start making custom firmware 4.3 .ipsw file that is going to be jailbroken.
- Now switch to DFU mode.
3. Now to restore this created custom firmware 4.3 on iPad, follow below steps
- Start iTunes and choose the iOS device. For Mac then click restore while pressing and holding the “alt” button. Specify the location for custom firmware.
- Click on .ipsw file to select it and hit the Open button. ITunes will install it automatically.
4. For the last step of tethered mode booting, do the following
- Extract the zip file of downloaded tetheredboot utility.
- Create a copy of .ipsw file, rename its extension as .zip and extract it.
- Navigate to /Firmware/dfu/. Then copy below files.
- Place these two files along with tetheredboot utility to the new folder of tetheredboot on desktop.
- Turn the iPad off. Launch terminal on OS x.
- Run below commands and hit return. Don’t forget to mention the directory name .
- Switch to DFU mode on prompt. Wait for few minutes while terminal will show the message “Exiting Libpois0n”. After few moments, you will have your tethered mode jailbroken iPad.


